

Raspberry pi os 64-bit が、ベータ版ですが公開されています。
USB Boot にも対応しているということなので、試しましょう!
OSはどこ?
プロダクトのページ内に、フォーラムへのリンクが張ってあります。
https://www.raspberrypi.org/blog/8gb-raspberry-pi-4-on-sale-now-at-75/
Raspberry Pi OS (64 bit) beta test version
https://www.raspberrypi.org/forums/viewtopic.php?f=117&t=275370&sid=8ed5c32a4543a238a02126041aade3e5
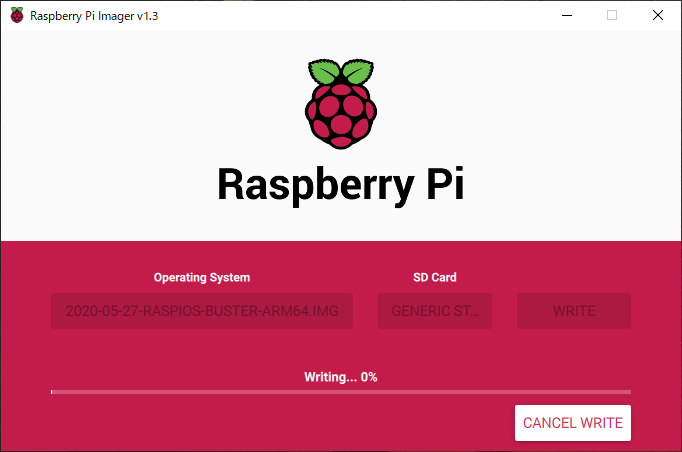
imagae name
2020-05-27-raspios-buster-arm64
でした。
なお、micro sd への焼付は、Raspberry Pi Imager Tool 使ってね! って書いてあります。
新しくリリースされたようです。
Known issues
1) There is no hardware video acceleration in VLC or Chromium
2) libraspberrypi0, libraspberrypi-dev and libraspberrypi-doc have been moved out of /opt/vc/* and into /usr/* instead (making it more standard). Any code built against these libraries will require changing to refer to a more standard location (/usr/lib/ rather than /opt/vc/lib)
3) Due to 2) Many packages that expect libGLESv2.so libEGL etc will require rebuilding.
4) raspberrypi-bootloader and raspberrypi-kernel contain useless non-64bit binaries and is missing the work done to minimise the delay between files being deleted and installed to /boot
5) There is no Wolfram Mathematica built for AArch64
6) Minecraft shim layer requires rebuilding to cope with 2)
7) VLC needs rebuild (not available)
8) VNC server not rebuilt yet for 64bit
VNCがそのままでは動かないのは、ちょっと面倒そうです。
Forumでは、tightvncserver x11vnc での動作報告が上がっています。
今回は、x11vnc を入れました。
Raspberry Pi Imager Tool で焼き付ける
Balena Etcher から、乗り換えです。
可愛いです。
データをコピーする
SD Card Copier
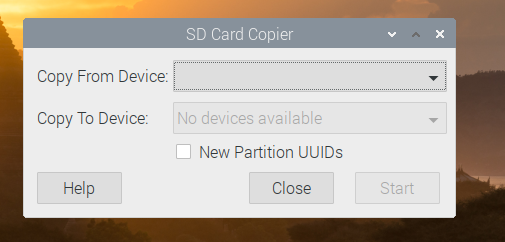
左上の RaspberryのMenu → Accessories → SD Card Cpoier に進む。
Copy From と Copy To を設定し、Partitionも作成させました。
micro SD を抜いて、起動
前回の方法 よりも、断然ラクチンです。
VNC使えない問題
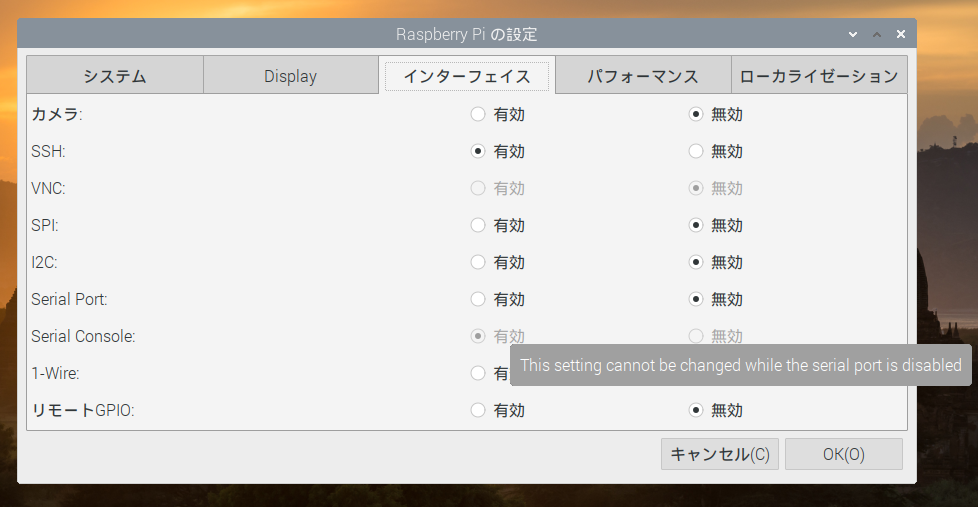
確かに、デフォルトではVNCをONにできません。
X11vnc を試す
フォーラムでおすすめされていたので、X11vnc を試してみようと思います。
https://github.com/raspberrypi/Raspberry-Pi-OS-64bit/issues/3
$ sudo apt-get install x11vnc
$ sudo x11vnc -storepasswd yourVNCpasswordHERE /etc/x11vnc.pass
/etc/systemd/system/x11vnc.service の作成
[Unit]
Description="x11vnc"
Requires=display-manager.service
After=display-manager.service

[Service]
ExecStart=/usr/bin/x11vnc -shared -forever -xkb -noxrecord -noxfixes -noxdamage -display :0 -auth guess -rfbauth /etc/x11vnc.pass
ExecStop=/usr/bin/killall x11vnc
Restart=on-failure
Restart-sec=2

[Install]
WantedBy=multi-user.target
有効かと、自動起動設定。
$ sudo systemctl daemon-reload
$ sudo systemctl start x11vnc
$ sudo systemctl enable x11vnc
Raspi4の場合には先に、raspi-config → Advanced option → Resolution から、解像度を設定しておく必要があるそうです。
これで、Headless mode で動く raspios 64-bit マシンができました。